
When it comes to moving out of a rental property, the importance of end of lease cleaning cannot be overstated. This process is not just about tidying up; it’s a crucial step that can significantly impact your bond refund. As a tenant, you are often required to leave the property in the same condition as when you first moved in, which means a thorough clean is essential. Many landlords and property managers expect a high standard of cleanliness, and failing to meet these expectations can lead to deductions from your security deposit.
End of lease cleaning is more than just a chore; it’s an investment in your future. A clean property not only helps you secure your bond but also leaves a positive impression on your landlord, which can be beneficial for future rental references. As industry leaders in cleaning services, we understand the nuances of what landlords look for during inspections. Our expertise ensures that every corner of your home is spotless, giving you peace of mind as you transition to your next chapter.
Key Takeaways
- End of lease cleaning is essential for getting your security deposit back and leaving the property in good condition for the next tenant.
- Kitchen cleaning checklist includes cleaning appliances, countertops, cabinets, and floors to ensure a hygienic and tidy kitchen.
- Bathroom cleaning checklist covers cleaning the toilet, shower, bathtub, sink, and mirrors to maintain a clean and fresh bathroom.
- Living room and bedroom cleaning checklist involves dusting, vacuuming, and organizing furniture and decor for a neat and inviting space.
- Cleaning checklist for carpets and floors includes vacuuming, mopping, and spot cleaning to remove stains and dirt from all floor surfaces.
Kitchen Cleaning Checklist
The kitchen is often the heart of the home, and it requires special attention during end of lease cleaning. Start by clearing out all food items from the pantry and refrigerator. Once empty, thoroughly clean these spaces with a suitable disinfectant. Pay special attention to any spills or stains that may have accumulated over time.
Don’t forget to clean the oven and stovetop; these areas can harbor grease and grime that are often overlooked. Next, focus on the countertops, cabinets, and sink. Wipe down all surfaces with a non-abrasive cleaner to remove any residue. For cabinets, ensure you clean both the inside and outside, as well as the handles.
The sink should be scrubbed to remove any stains or buildup, and don’t forget to polish the faucet for that extra shine. By following this kitchen cleaning checklist, you’ll ensure that this vital area meets the high standards expected by landlords.
Bathroom Cleaning Checklist
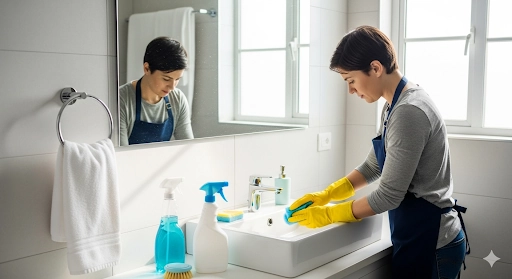
Bathrooms can be one of the most challenging areas to clean, but they are also one of the most scrutinized. Start by removing all personal items and toiletries. Once the space is clear, tackle the toilet first. Use a toilet cleaner and brush to scrub the bowl thoroughly, and don’t forget to wipe down the exterior with disinfectant wipes.
Next, focus on the shower or bathtub; use a suitable cleaner to remove soap scum and mildew. After addressing the toilet and shower, turn your attention to sinks and mirrors. Clean the sink with a non-abrasive cleaner and polish the faucet for a sparkling finish. Mirrors should be cleaned with glass cleaner to remove any streaks.
Finally, mop the floor and ensure that all surfaces are dry and free from any hair or debris. A meticulous bathroom cleaning checklist will help you leave this space spotless and ready for inspection.
Living Room and Bedroom Cleaning Checklist
| Task | Frequency | Completed |
|---|---|---|
| Dust furniture | Weekly | Yes |
| Vacuum carpets | Weekly | Yes |
| Change bed sheets | Bi-weekly | No |
| Clean mirrors | Monthly | No |
The living room and bedrooms are spaces where we spend a lot of time, making them crucial for end of lease cleaning. Begin by decluttering these areas; remove all personal items, including furniture if necessary. Dust all surfaces, including shelves, baseboards, and light fixtures. Pay special attention to electronics; use a microfiber cloth to avoid scratches while removing dust.
Next, focus on vacuuming carpets or mopping hard floors. If you have carpets, consider using a carpet cleaner for deep stains or odors. For hard floors, ensure they are swept and mopped thoroughly. Don’t forget to clean windows and window sills in these rooms as well; this will enhance the overall brightness of the space.
By following this living room and bedroom cleaning checklist, you’ll create an inviting atmosphere that meets your landlord’s expectations.
Cleaning Checklist for Carpets and Floors
Carpets and floors can accumulate dirt and stains over time, making them a focal point during inspections. Start by vacuuming carpets thoroughly to remove loose dirt and debris. If there are any stains, treat them with a carpet cleaner appropriate for your carpet type. For hard floors, sweep or vacuum first before mopping with a suitable floor cleaner.
Consider hiring professional carpet cleaning services if your carpets are heavily soiled. This can make a significant difference in appearance and odor. For hard floors, ensure that you use the right cleaning solution for your specific flooring type—whether it’s tile, laminate, or hardwood—to avoid damage. By adhering to this cleaning checklist for carpets and floors, you’ll ensure that these surfaces are pristine and ready for inspection.
Checklist for Walls, Doors, and Windows

Walls, doors, and windows often go unnoticed during regular cleaning but are essential for end of lease cleaning. Start by inspecting walls for any marks or stains; use a damp cloth with mild detergent to wipe them down gently. For stubborn marks, consider using a magic eraser or touch-up paint if necessary. Next, turn your attention to doors and windows. Wipe down all doors with a suitable cleaner, paying attention to handles and hinges.
For windows, use glass cleaner for a streak-free finish on both the inside and outside surfaces. Don’t forget to clean window sills as well; dust can accumulate here easily. By following this checklist for walls, doors, and windows, you’ll ensure that every aspect of your home is ready for inspection.
Outdoor and Garage Cleaning Checklist
Don’t overlook outdoor areas when preparing for end of lease cleaning. Start by clearing any debris from patios or balconies; this includes leaves, dirt, or any personal items left behind. Sweep or hose down these areas to remove dirt buildup. If you have outdoor furniture, wipe it down with appropriate cleaners to ensure it looks its best.
The garage is another area that often requires attention.
Remove any items that don’t belong there and organize what’s left.
Sweep out dust and debris from the floor; if necessary, mop it down for a thorough clean. By following this outdoor and garage cleaning checklist, you’ll ensure that every part of your property is in top condition.
Final Touches and Inspection Checklist
As you approach the end of your end of lease cleaning journey, it’s time for final touches. Conduct a thorough walkthrough of your property to ensure nothing has been overlooked. Check each room against your cleaning checklists to confirm that everything is spotless. Pay special attention to areas like behind appliances or under furniture where dust may accumulate.
Finally, consider scheduling an inspection with your landlord or property manager. This allows you to address any concerns they may have before officially moving out. A clean property not only helps secure your bond but also leaves a lasting impression on your landlord. By following this final touches and inspection checklist, you’ll be well-prepared for a successful move-out experience.
In conclusion, end of lease cleaning is an essential part of moving out that requires careful planning and execution. By following these comprehensive checklists for each area of your home, you can ensure that every corner is cleaned to perfection. If you need assistance or want to save time during this process, consider hiring professional cleaning services like ours—industry leaders dedicated to providing top-notch service tailored to meet your needs.
Don’t hesitate; contact us today for a quote!
When it comes to end of lease cleaning, it’s important to have a thorough checklist to ensure you leave the property in top condition.
FAQs
What is an end of lease cleaning checklist?
An end of lease cleaning checklist is a comprehensive list of cleaning tasks that need to be completed before moving out of a rental property. It is often provided by landlords or property managers to ensure that the property is left in a clean and tidy condition.
Why is an end of lease cleaning checklist important?
An end of lease cleaning checklist is important because it helps to ensure that the property is returned to the landlord or property manager in the same condition as when it was first rented. It also helps to avoid any disputes over the condition of the property and the return of the security deposit.
What are some common tasks on an end of lease cleaning checklist?
Common tasks on an end of lease cleaning checklist may include cleaning the kitchen (including appliances, cabinets, and countertops), bathrooms (including toilets, showers, and sinks), floors (vacuuming and mopping), windows, walls, and any other areas of the property that require cleaning.
Who is responsible for completing the end of lease cleaning checklist?
The responsibility for completing the end of lease cleaning checklist typically falls on the tenant who is moving out of the rental property. However, some landlords or property managers may offer the option to hire professional cleaners to complete the checklist.
What happens if the end of lease cleaning checklist is not completed satisfactorily?
If the end of lease cleaning checklist is not completed satisfactorily, the landlord or property manager may withhold all or a portion of the tenant’s security deposit to cover the cost of cleaning the property. It is important for tenants to carefully review the checklist and ensure that all tasks are completed to the required standard.